We can't find the internet
Attempting to reconnect
Something went wrong!
Hang in there while we get back on track
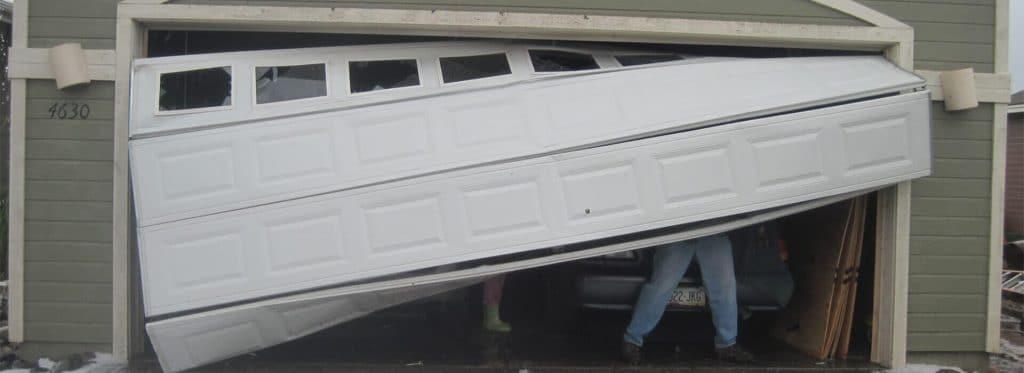
To know if maintaining your garage door is important, picture this: You’re leaving for work, already slightly late, and you’re super stressed because you have a big presentation. Your boss’s boss will be there and if you do a good job, you’re definitely in line for a promotion. So you get into your car, make sure you’ve got your notes, send a panicked glance at the clock, and press the button that lowers the door. Which gets stuck halfway. And doesn’t move.
This guide teaches you the basic knowhow of maintaining important aspects of your garage door. (To make sure the above scenario never happens to you!
This will prevent the door from making noises, getting stuck, and other inconvenient things. Use a spray lubricant to grease the door’s hinges, rollers and tracks, and the door opener’s chain or drive screw.
It’s pretty common for hardware to loosen over time – after all, your garage door moves up and down several times every day. Inspecting your hardware regularly will help you catch loose roller brackets or bolts early on, making maintenance easier in the long-run.
If there is something off about the balance (and this happens more often than you might think), the door opener has to work harder to open and close the door, causing it to wear out easily.
To check the balance, disconnect the opener. Open or lower the door halfway. If it’s balanced, it will hold its position without any support, but if it falls or rides up, the spring’s tension needs to be modified.
All you need to do is place an object (like a brick) on the ground in front of the door. When the door coming down touches that object, it should go right back up again. Modern doors have another mechanism called a photocell. To test this, close your door and wave your leg in its path. It should reverse straight away.
You know you might need to do this if you hear groaning sounds as the door operates. Disconnect the opener from the power source and raise the door to about chest height. After detaching it from the opener, close it (by hand) to work on the chain. Find the adjustment bolt that connects to the chain. Turn the two nuts on either side (use a simple wrench for this) to turn the first nut clockwise and the second, counterclockwise. Keep tightening until the chain is about ¼ of an inch from the bottom of the rail. (Be careful not to overtighten, it might cause it to break.)
If you have a wooden garage door, wipe it with a dry cloth. Don’t use water. Regularly inspect the door for signs of insect damage. Vinyl and other synthetic doors should be rubbed with an appropriate cleaner, rinsed with a hose and then dried with a soft (preferably microfiber cloth). Remember to check the inside of the doors for cobwebs and brush them away with a soft dry cloth.
If your garage door doesn’t open with the wall button (try it after unplugging the door opener), you’ll need to replace the backup battery. Use a screwdriver to remove the cover on the opener and replace the old battery with a new one. Change the batteries in door remotes and replace the door opener light bulbs with the size and wattage recommended in the manual. (Don’t settle for a substitute.)
If your garage door opens too fast or too slow for you, you’ll need to adjust the tension of the torsion springs. It’s easier than it sounds. Keep the door ‘locked’ open with locking pliers and change the position of the S-hook on the track brace. You can keep adjusting the springs until you get the speed you want.
When it comes to maintaining homes and garages, it’s easy to neglect the little stuff. And that often ends up creating inconvenient situations. If you’re not convinced it’s going to be a DIY job, get your garage door checked by a professional. It might mean you won’t have to install a new one anytime soon.